I jumped the gun and bought my new-to-me Honda Shadow ACE 1100 before selling my PC800 because it was already set up almost exactly the way I wanted (and because I have the most understanding wife in the world). I’m loving it and have absolutely no regrets. But, as always, the key word is “almost.” There’s always stuff to tweak and adjust and change to my liking.
The Story So Far
I may have only had the bike for a week so far, but I already dove in and tweaked some things. As you do on any project bike to make it truly your own. Unfortunately, not all of the modifications have been by choice.
Handlebar Adjustment
This is the first thing I did after rolling the bike into my garage. The previous owner either had longer arms than me or liked to lean forward, so the handlebars were too far forward for my comfort. Four 6mm Allen bolts loosened it up and let me swing it back to where my hands naturally fell to the controls.
Rear Turn Signals
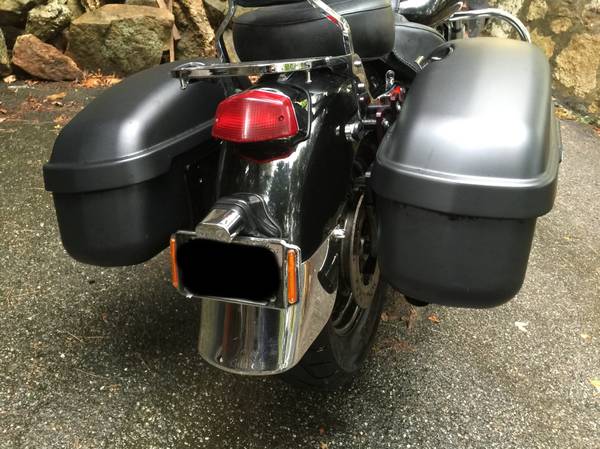
The previous owner got the bike with the aftermarket hard bags already installed. He did not get the original rear turn signals, which had to be removed because they interfered with the bags. I got the bike with a license plate frame that had two nearly invisible amber strips on the sides substituting for turn signals. Even better, they didn’t work.
I pondered numerous solutions for this, including adding a pair of trailer lights to the hard bags and a trailer light converter to make them run/turn/brake lights. But I was hesitant to drill holes in the perfect bags. As I continued researching, I learned that I would have to remove the rear fender to access the wiring, which runs underneath it. I pondered reusing the rear turn signals from our Suzuki Savage parts bike, but they would be similarly difficult to remove.
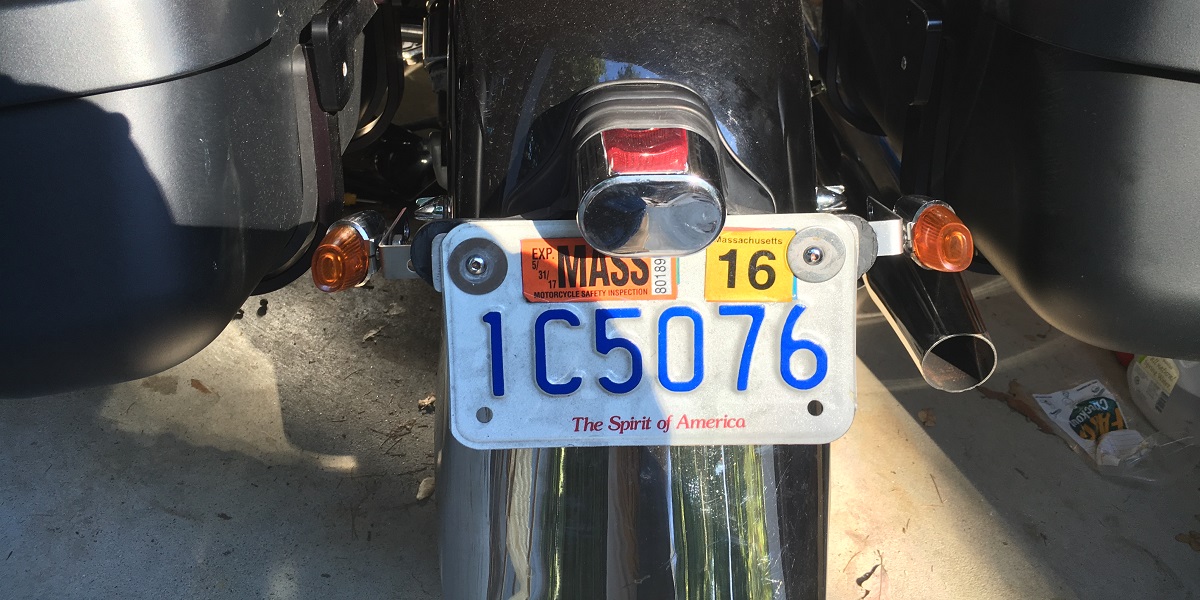
Digging through my toolbox I found a set of tiny turn signals I’d removed from my Suzuki GS1100L something like seven years ago. I’d replaced them with real turn signals right after getting the bike, partly because they didn’t work, and partly because I want turn signals that’ll actually be seen. But they worked on the Shadow, so as a temporary measure I picked up a pair of stainless steel L-brackets at the hardware store and bolted them in with the license plate frame. It wasn’t great, but it was a good short term solution, and I admit the small lights actually look pretty cool.
As a more permanent solution, I ordered up a pair of these from Lowbrow Customs. They’re larger, and since they’re dual filament I wired them up as running lights as well as turn signals by tapping power off the license plate light. That’ll make me more visible from the rear at all times, not just when I’m signaling for a turn.
The Driving Light Fiasco
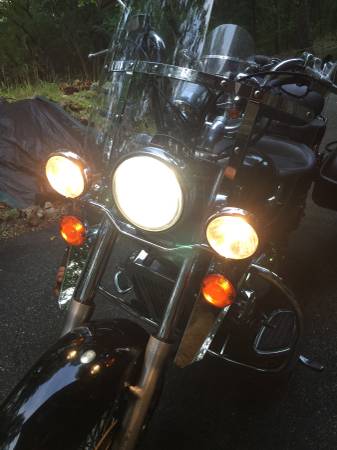 On my first night ride two things became clear very quickly. One was that the LED headlight bulb was rather good. The second was that my driving lights, which have halogen bulbs, were aimed WAY too low. I had no trouble seeing what’s directly ahead of my front wheel, but they needed to be tilted way up to actually be effective.
At first I could see no way to do this besides bending the mounting bracket, but McMike on Oppositelock pointed me to the owner’s manual, including aiming instructions. I had to remove the turn signal to gain access to the driving light mounting hardware, which I could then loosen and adjust. Unfortunately, with the power wire to the bulb running through the middle of the bolt and limited space, there was no way to adjust the lights while they were actually on and tighten them up to a point where they’d actually stay put.
But that ended up not mattering. I blew my turn/brake/horn fuse as well as my brand new rear turn signal bulb, and traced the problem back to a stripped turn signal wire inside the light bar. Again, there was so little space to work with that I was unable to get inside, cut away the ripped insulation, and tape it up so it wouldn’t short out. This also prevented the spring loaded base of the socket from springing back and making contact with the turn signal bulb.
In the end, I decided that as much as I love the looks and potential performance of this light bar, it was more trouble than it was worth. It had to go. Removal was fairly simple. It was bolted in with the same two bolts that hold the headlight on. Since wiring was screwed up anyway, I had no issue cutting and removing it. Bye bye light bar, and my shorting out woes were gone. Unfortunately, so were my turn signals, and I had no way to mount new ones.

After a couple of trips to the bike shop and hardware store, I ended up buying, cutting, and bending a pair of L-brackets to fit. This is similar to what I did on the back, but there was more customization involved. My dinky little turn signals left over from my GS1100L didn’t draw enough current for the flasher to work correctly, so I bought a pair of generic turn signals, mounted and wired everything up, and it worked again. These signals are only single filament, not dual, so in addition to losing the driving lights I also lost the running lights. But at least they work, and don’t short out and blow fuses and bulbs. Speaking of, I couldn’t find any replacement bulbs at local motorcycle or auto parts stores, so I had to search and order it online. I bought two to have a backup.
Exhaust Patch

The Shadow ACE is loud. Sure, any bike will seem loud compared to my PC800, which sounded like a sewing machine at idle. The Shadow ACE, in particular, is designed to sound like a Harley with its single pin crank, unique from other Shadow versions, and is supposed to have a nice lopey rumble. But in addition to having aftermarket pipes, one of them was loose, and there was a leak before the muffler. I value my hearing, as well as favorable relations with neighbors and law enforcement. I’m also not a believer in the “loud pipes save lives” philosophy, and felt like a hypocrite for running loud pipes myself. So I had to do something about it.
Tightening all of the bolts on the exhaust helped, but didn’t solve the problem. I decided to try one of those exhaust wrap patch deals from the parts store. The one I got was designed to apply when cold, then tighten down with baling wire to hold it in place temporarily. I was then forced to ride for a while to heat up the exhaust and make the patch essentially shrink wrap itself around the affected area. It was a tough job, but I fell on that sword. I didn’t expect much, but darned if after about 20 minutes or so the “blat blat blat” of the leaky exhaust faded away to a more respectable rumble, only getting loud when I gave it a lot of throttle as designed.
I’ll admit that the patch isn’t the most aesthetically pleasing thing I’ve ever seen, but it’s not bad, and more importantly it does the job. I may or may not replace the exhaust someday.
The To-Do List
Of course, a project bike is never done. Here’s what’s left to do.
Matching Front Turn Signals

Lowbrow Customs sells an amber version of the dual filament bullet lights I used on the back. With the light bar gone, I’d like to pick up a pair of these to put on the front. They’ll match the rear lights perfectly since they’re exactly the same except for the lens color, and they’ll match the bike better than the arrow shaped turn signals I just added. I’ll also get my running light functionality back. No fancy wiring required like the rear lights – the Shadow is already wired for front running lights from the factory.
Unfortunately these lights are out of stock at the moment, so I’ll have to wait on ordering them. The single filament version is in stock, but I want my running lights, especially since I also lost my driving lights. Speaking of which…
Driving Lights v2.0
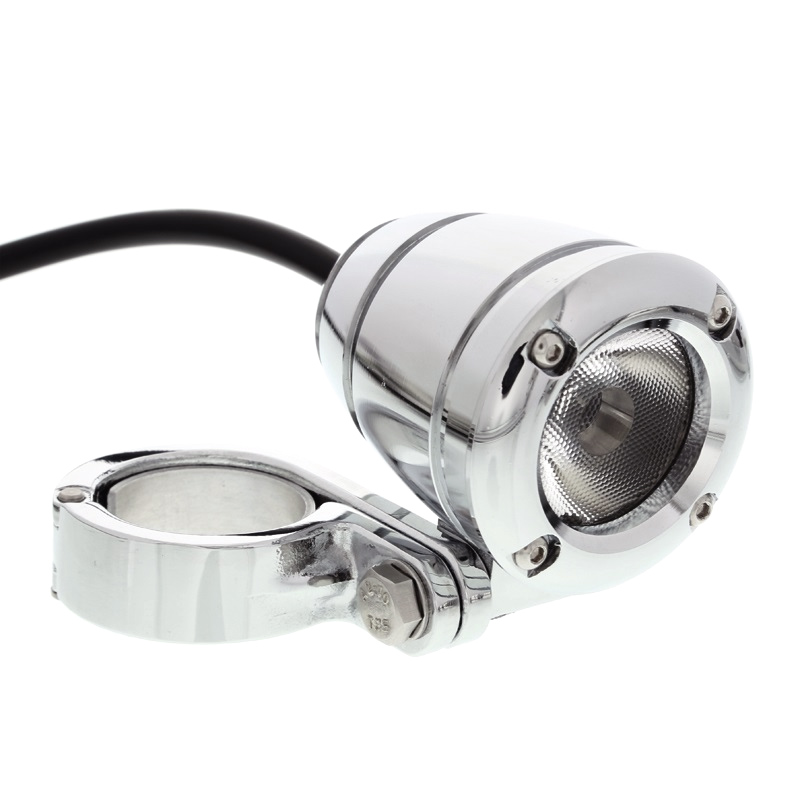
There was no problem with the wiring for the driving lights, so I simply cut it, coiled it up, and stuffed it away for later use. I need to figure out what to do about that. Can I find a better way to install the driving lights from the old light bar? Or should I try something entirely new, perhaps mounted to my crash bars to avoid blinding oncoming drivers? I had good experience with these lights from SuperBrightLEDs on my PC800. Even better, they also sell clamps for this exact application. The photos even demonstrate the same driving light I’d use mounted to them. About $130 would get me the complete setup for both sides of the bike.
I do agree with Andrew P. Collins’ review on Jalopnik that halogens are better for throwing light far down the road, but these particular LED lights are a solution I’ve already used with great success. Plus I need a solution that will also allow my turn signals to remain, and preferably not be hidden by the brightness of the driving lights. Or maybe I can find some brackets that will let me mount the halogen lamps from the light bar somewhere else. I have to figure it out. Fortunately, the wiring is all there and ready to go, complete with a handlebar switch, so I just need to figure out the physical stuff.
Black Reflective Tape
My bike is black. Black means it doesn’t show up at night very well, because the night is dark and full of terrors. My hard bags obscure the stock reflectors below the passenger seat, making the problem worse. But I like how the bike looks dark and badass during the day, and I don’t want to spoil that. The answer is black reflective tape. It’s black-on-black during the day, but it shines at night when lit up by headlights. A stripe or two on the side and rear of the hard bags ought to do the trick. Maybe I’ll put some on my helmet as well.
Passenger Backrest
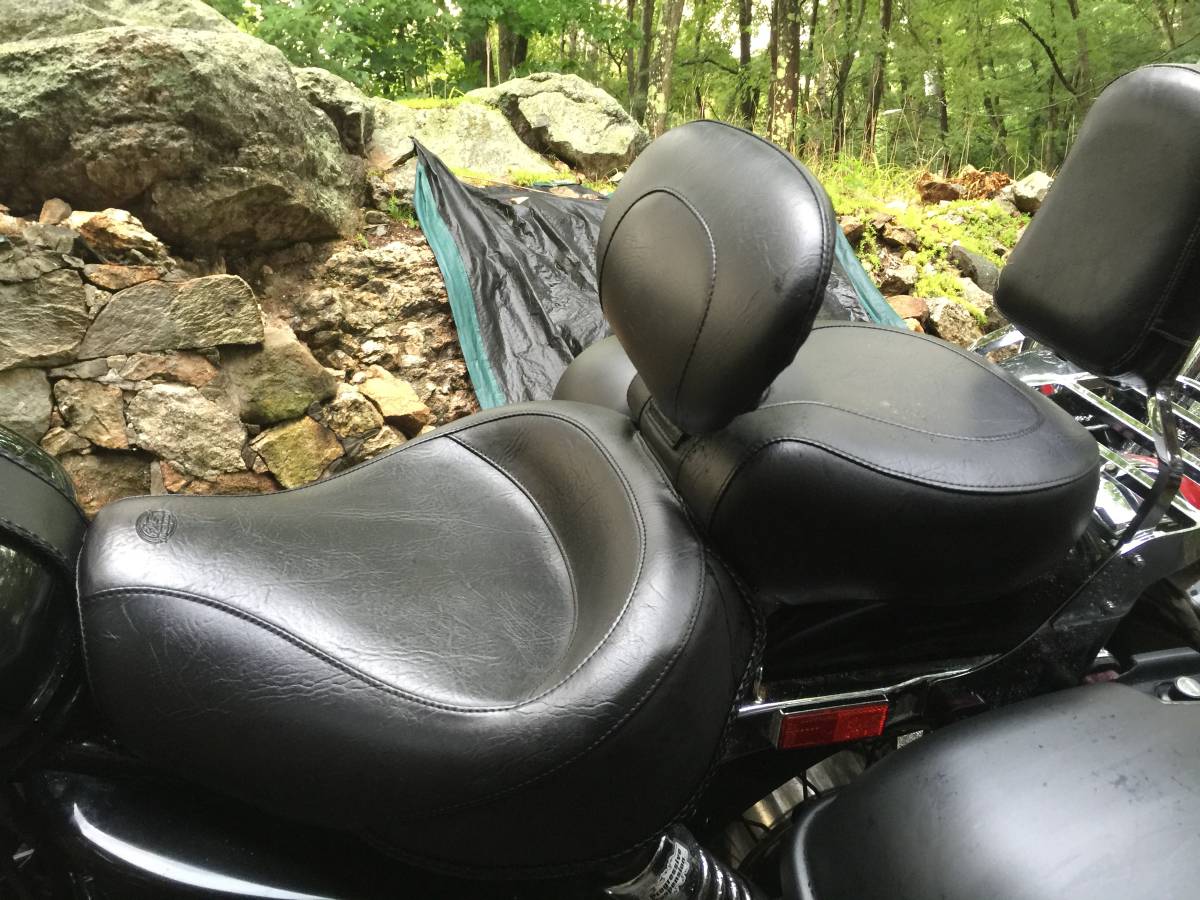
The driver gets spoiled with a nice cushy Mustang seat and backrest, but the stock passenger backrest remains. It’s showing its age with a little frayed stitching, but beyond that it’s uncomfortable for my wife. She wants the option of riding with me in addition to riding her own bike, so we’ll have to upgrade that at some point.
OEM Heel-Toe Shifter

The Shadow ACE came standard with a heel-toe-shifter, like a Harley. The previous owner cut off the heel portion of the shifter. After adding the floorboards he couldn’t operate the shifter properly with the limited mobility of his steel toed work boots. The shifter is quite usable in the normal up-down manner, but I kind of liked being able to push down on the shifter in both directions on the Harley Street Glide I rented in Florida. It’s an easy swap to another OEM part. I found this one on eBay for $50. But it’s a low priority right now, especially since I’ve already spent a little extra on repairs than I intended so soon after buying the bike. This will most likely be an over-the-winter upgrade if I stumble across one for a good price.
A project is never done, and cruisers just beg for customization. As funds allow, little by little, I’ll work my way through these minor tweaks and fixes to make the Shadow uniquely my own.
