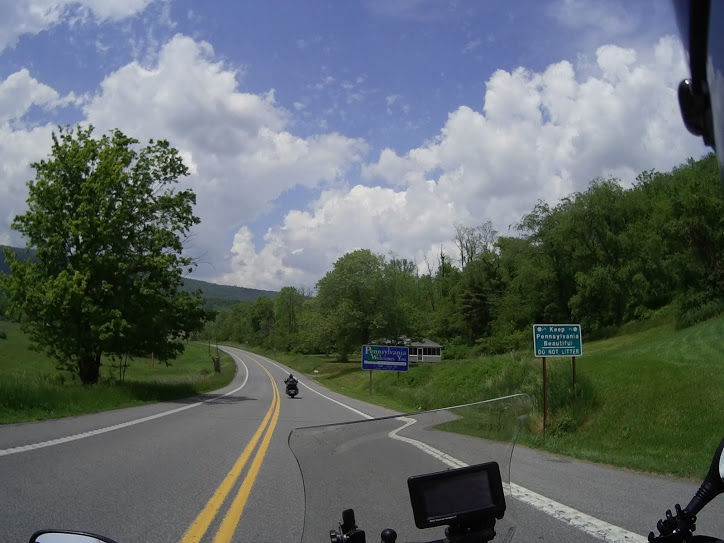
I discovered this app by asking the same question myself after seeing some track videos with amazing telemetry. I used to do track days in cars regularly, and picked up the hobby again last year with my Subaru BRZ. I got some decent video with my GoPro, but especially since I’d be sharing my videos on our sister site Right Foot Down, I wanted to do something special. After upgrading to an iPhone 6s (an Android version is also available) with lots of memory, I splurged $27.99 for the Grand Prix Edition of Harry’s Lap Timer.
There are different versions available, for different prices with different features. The Rookie Edition is the most basic version for $8.99. It doesn’t support video, but it does give you access to all of the extensive telemetry features. That includes top speeds, corner speeds, lap times, split times, and all kinds of good stuff. The Petrolhead Edition will run you $19.99 and is where you gain video overlay capabilities. Basically the app simply records video at the same time as telemetry, and later gives you the option to mash the two together to make videos like the ones I made. The Grand Prix Edition is the big kahuna, enabling additional camera overlays. I intended to use my phone in my car for forward facing video, plus a GoPro on the back bumper for a picture-in-picture rear view. You can also overlay a reference lap on top of any lap to compare where you were faster and where you lost time.
At The Track
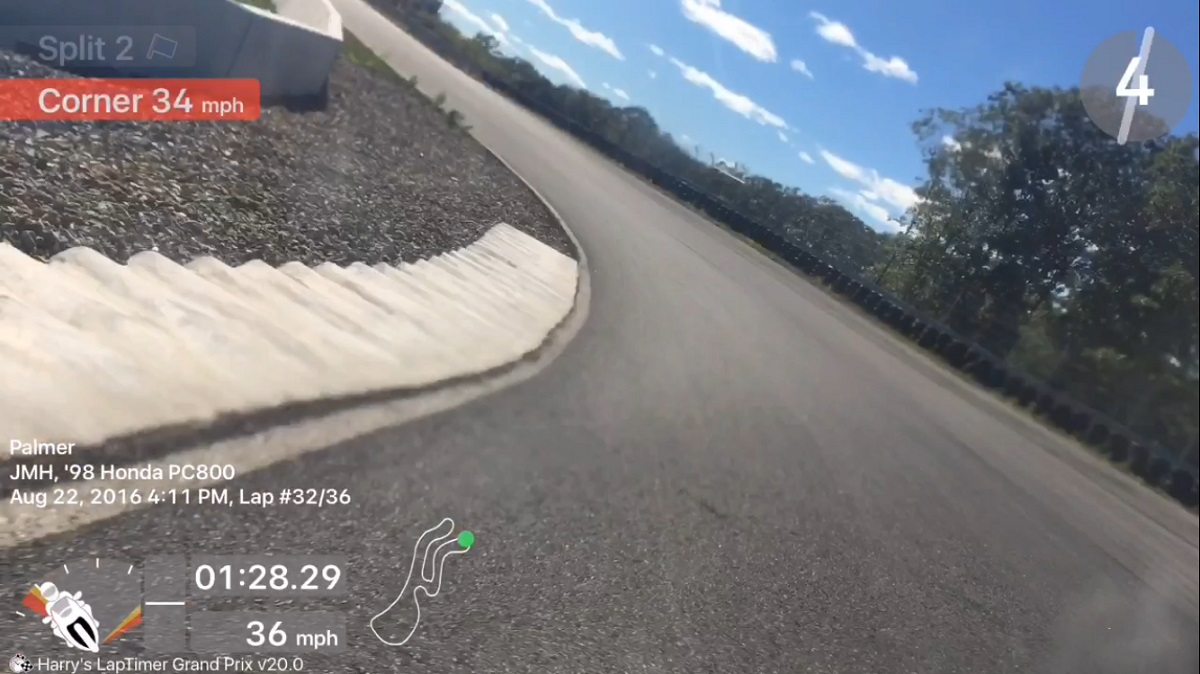
Obviously you’ll need to mount your phone quite securely to your bike, both to satisfy the technical inspectors and so that your precious phone doesn’t go skating down the track at 110mph. I use a Ram Mount X-Grip for my everyday riding, and it works great for that. I added a zip-tie to keep it shut and keep the phone attached to the bike on the track. I also plugged in external power, since the app drains the battery pretty quickly by using the GPS and camera constantly.
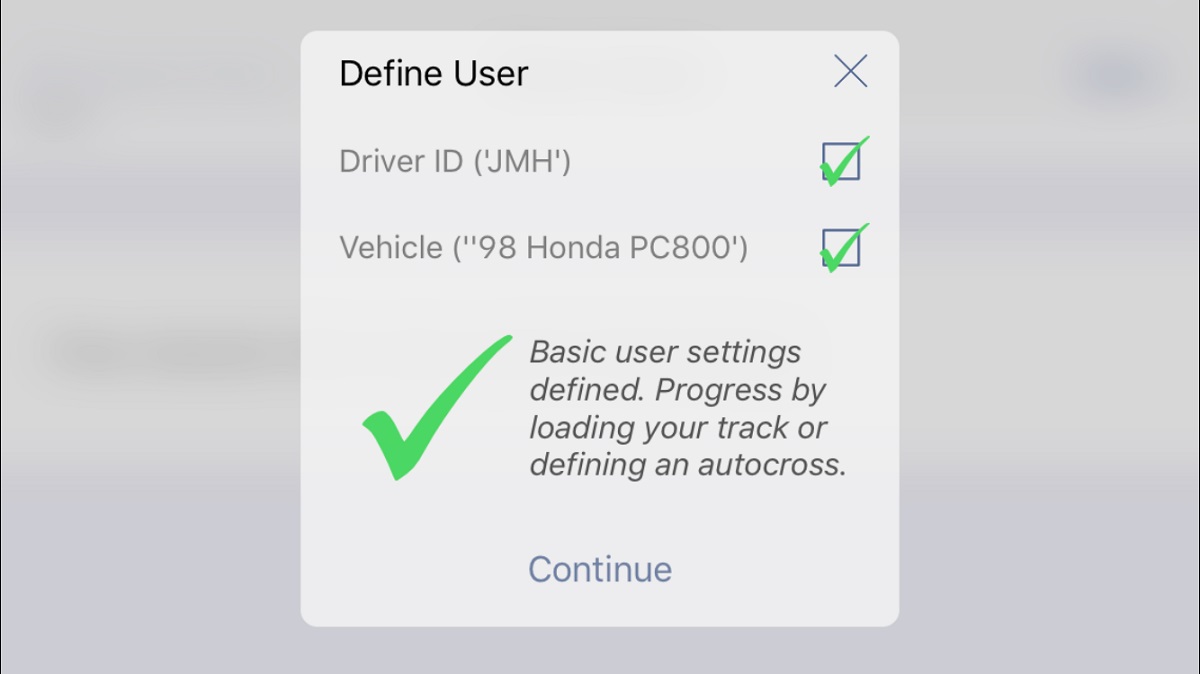
There is a little bit of configuration involved before you hit the track. First, you have to define the user (your name) and your vehicle information. You don’t have to fill out every last detail, but the more information you provide, the more accurate and interesting your telemetry and video will be. Once that’s done, you load the track where you are are running. Unless the track is brand new, there’s already a file containing GPS coordinates for all of the turns, the start/finish line, and other key locations. If you’re on a brand new track that isn’t listed, fear not – you can create it. Once that’s set, you’re ready to “race!” Even if you’re just lapping and not racing.
One of my least favorite parts about recording track video is that you generally have to manually start recording before you get on the track so that your attention is on driving/riding rather than fiddling with the camera. This problem is even worse when you’re wearing gloves and recording on your phone, which doesn’t react to the presses of your gloved fingers. You end up with several boring minutes of video showing people standing around the grid doing nothing before finally entering the track. But not with Harry’s Lap Timer! After you configure your session and tell it to “race,” it will go into a standby mode until you cross the start/finish line, then begin recording automatically. Ignore your phone. There’s no need to stab at your phone at triple digit speeds while riding – it’s got this. You will need to manually stop recording at the end of your session, but that’s OK – there’s no rush, and you can just trim the last minute or two off your video like I did.
Within the app, you can watch your video and telemetry overlay as soon as you’re done recording. If you’re racing or time trialing, this can give you immediate feedback as to where you can go a bit faster, or where you’re going a bit too fast and giving up some control. At Tony’s Track Days’ event, I had very little time between my track and classroom sessions, so I just recorded everything for later review. Well, almost everything – I chose not to record my first session, which was slow follow-the-leader laps to familiarize ourselves with the track. And something went wrong with my fourth session that made it not record properly. I’m not sure what, but my fifth and sixth sessions recorded perfectly, so it was probably a one time error. This was also my first time actually using the app at the track, so the error could well have been my own.
At Home

After the event, no doubt you’ll be wanting to show off to your friends – I mean, analyze your telemetry in detail to see where you can improve next time. While you can view the overlay video within the app immediately, to share it with the world you’ll need to render a new video containing it and save it to your phone. My full sessions, roughly 16 minutes of video, are about 3GB each, so you’ll want to make sure you have some decent memory available on your phone before recording or rendering video. Also make sure you have some time on your hands. My 128GB iPhone 6s is no slouch for processing power, but it did take several minutes for each video to render, as well as a big chunk of battery for the large amount of processing power required. Plug in your phone and make sure you won’t need to use it for a little while before starting this process.
The resulting video is then available just like any other video file. I used iMovie to add fades, titles, and crop the end of the video back to where I pit in. Then I had to render the video all over again. You can see how this can eat up a lot of memory after a while. After that, I switched to the YouTube app and uploaded each video from there. You’ll obviously want to be on a WiFi connection for that so you don’t blow through your monthly data allotment in one shot.
These are the first videos I have ever shot, edited, and uploaded entirely from my phone. Normally I download the raw footage to my laptop, edit it in Adobe Premiere Elements, and upload it from there. Basic video editing like this was actually easier to do on my phone. I find that amazing, considering that I actually went to college for video production and writing. My phone can do more than all the equipment in the TV studio could.
The Bottom Line
If you already have a smartphone with a good camera and a decent amount of memory, you’re 95% of the way there. For the average “track day bro,” I’d recommend the $19.99 Petrolhead Edition, which gives you video telemetry overlays without the more fancy features. But you can get as simple or fancy as you want to with Harry’s Lap Timer.
Best of all, now you, too, can have the entire internet asking you, “How did you get that telemetry overlay?”
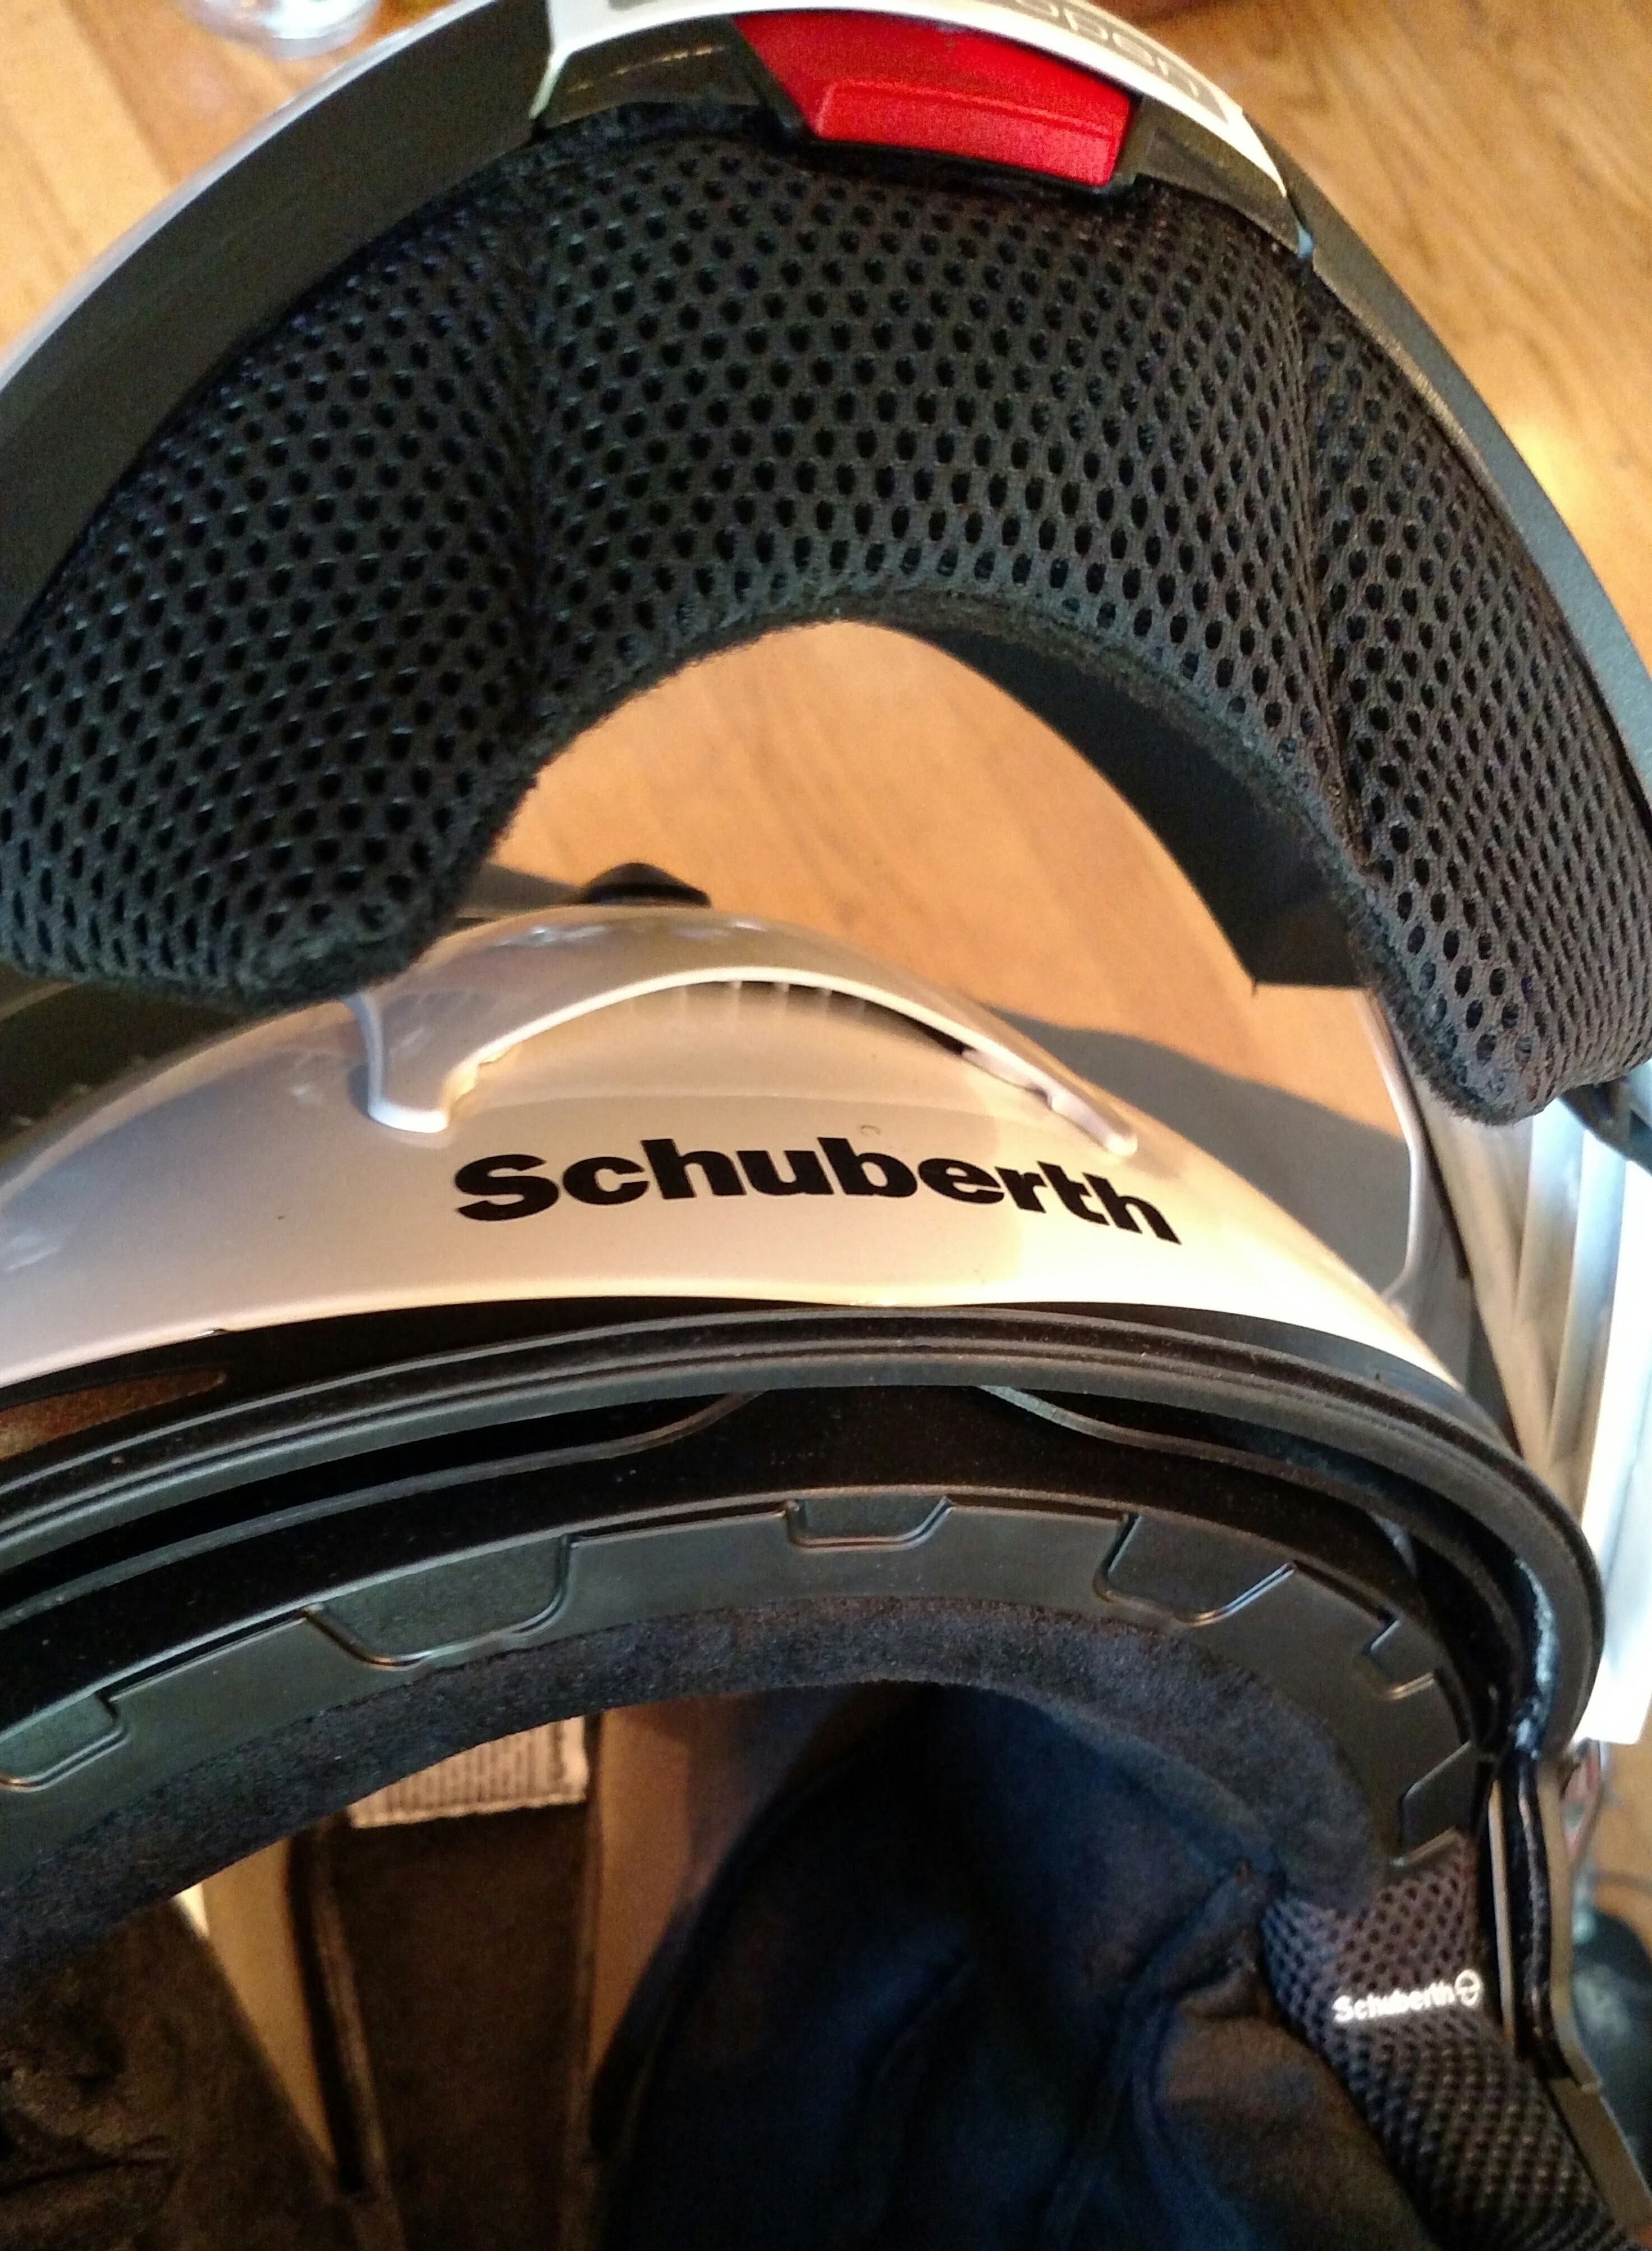
]]>I like this helmet. I don’t love it yet, but that’s where I’m going here. Helmet customization. Those of you who are Arai Signet loyalists know the first drill: back of a spoon to the forehead!
I can’t endorse purposefully compressing the hard foam inside your helmet. There’s that risk/reward scenario again — the more you compress the foam yourself the less compression it will offer your head in an accident. But without making a little more room for my oval skull the helmet was unwearable for more than 40 minutes. It didn’t take much compressing to make the helmet a comfortable fit.
The big problem I was having with this thing, though, is that I couldn’t breathe in it.
The chinbar on this helmet has a “chin curtain” which offers an excellent seal against wind, which means it fogs up my eyeglasses. Also, along my commute, in the sun, with the clear visor closed, I felt as though my face was in a greenhouse. I don’t like riding with the visor open, since I get sunburned very easily aaaaaand I don’t like bugs. The chin curtain holds onto the bugs that fly in through your open visor, until you can unlock the chinbar to evict them. Meanwhile they’re trying very hard to get out of there THROUGH YOUR FACE ooohkay no thanks.
There’s no easy information available on the web about this thing. I can’t be the only one ready to cut it off the helmet, can I?
So I start to pull at it, and I find bolts buried behind the hard foam of the chinbar.
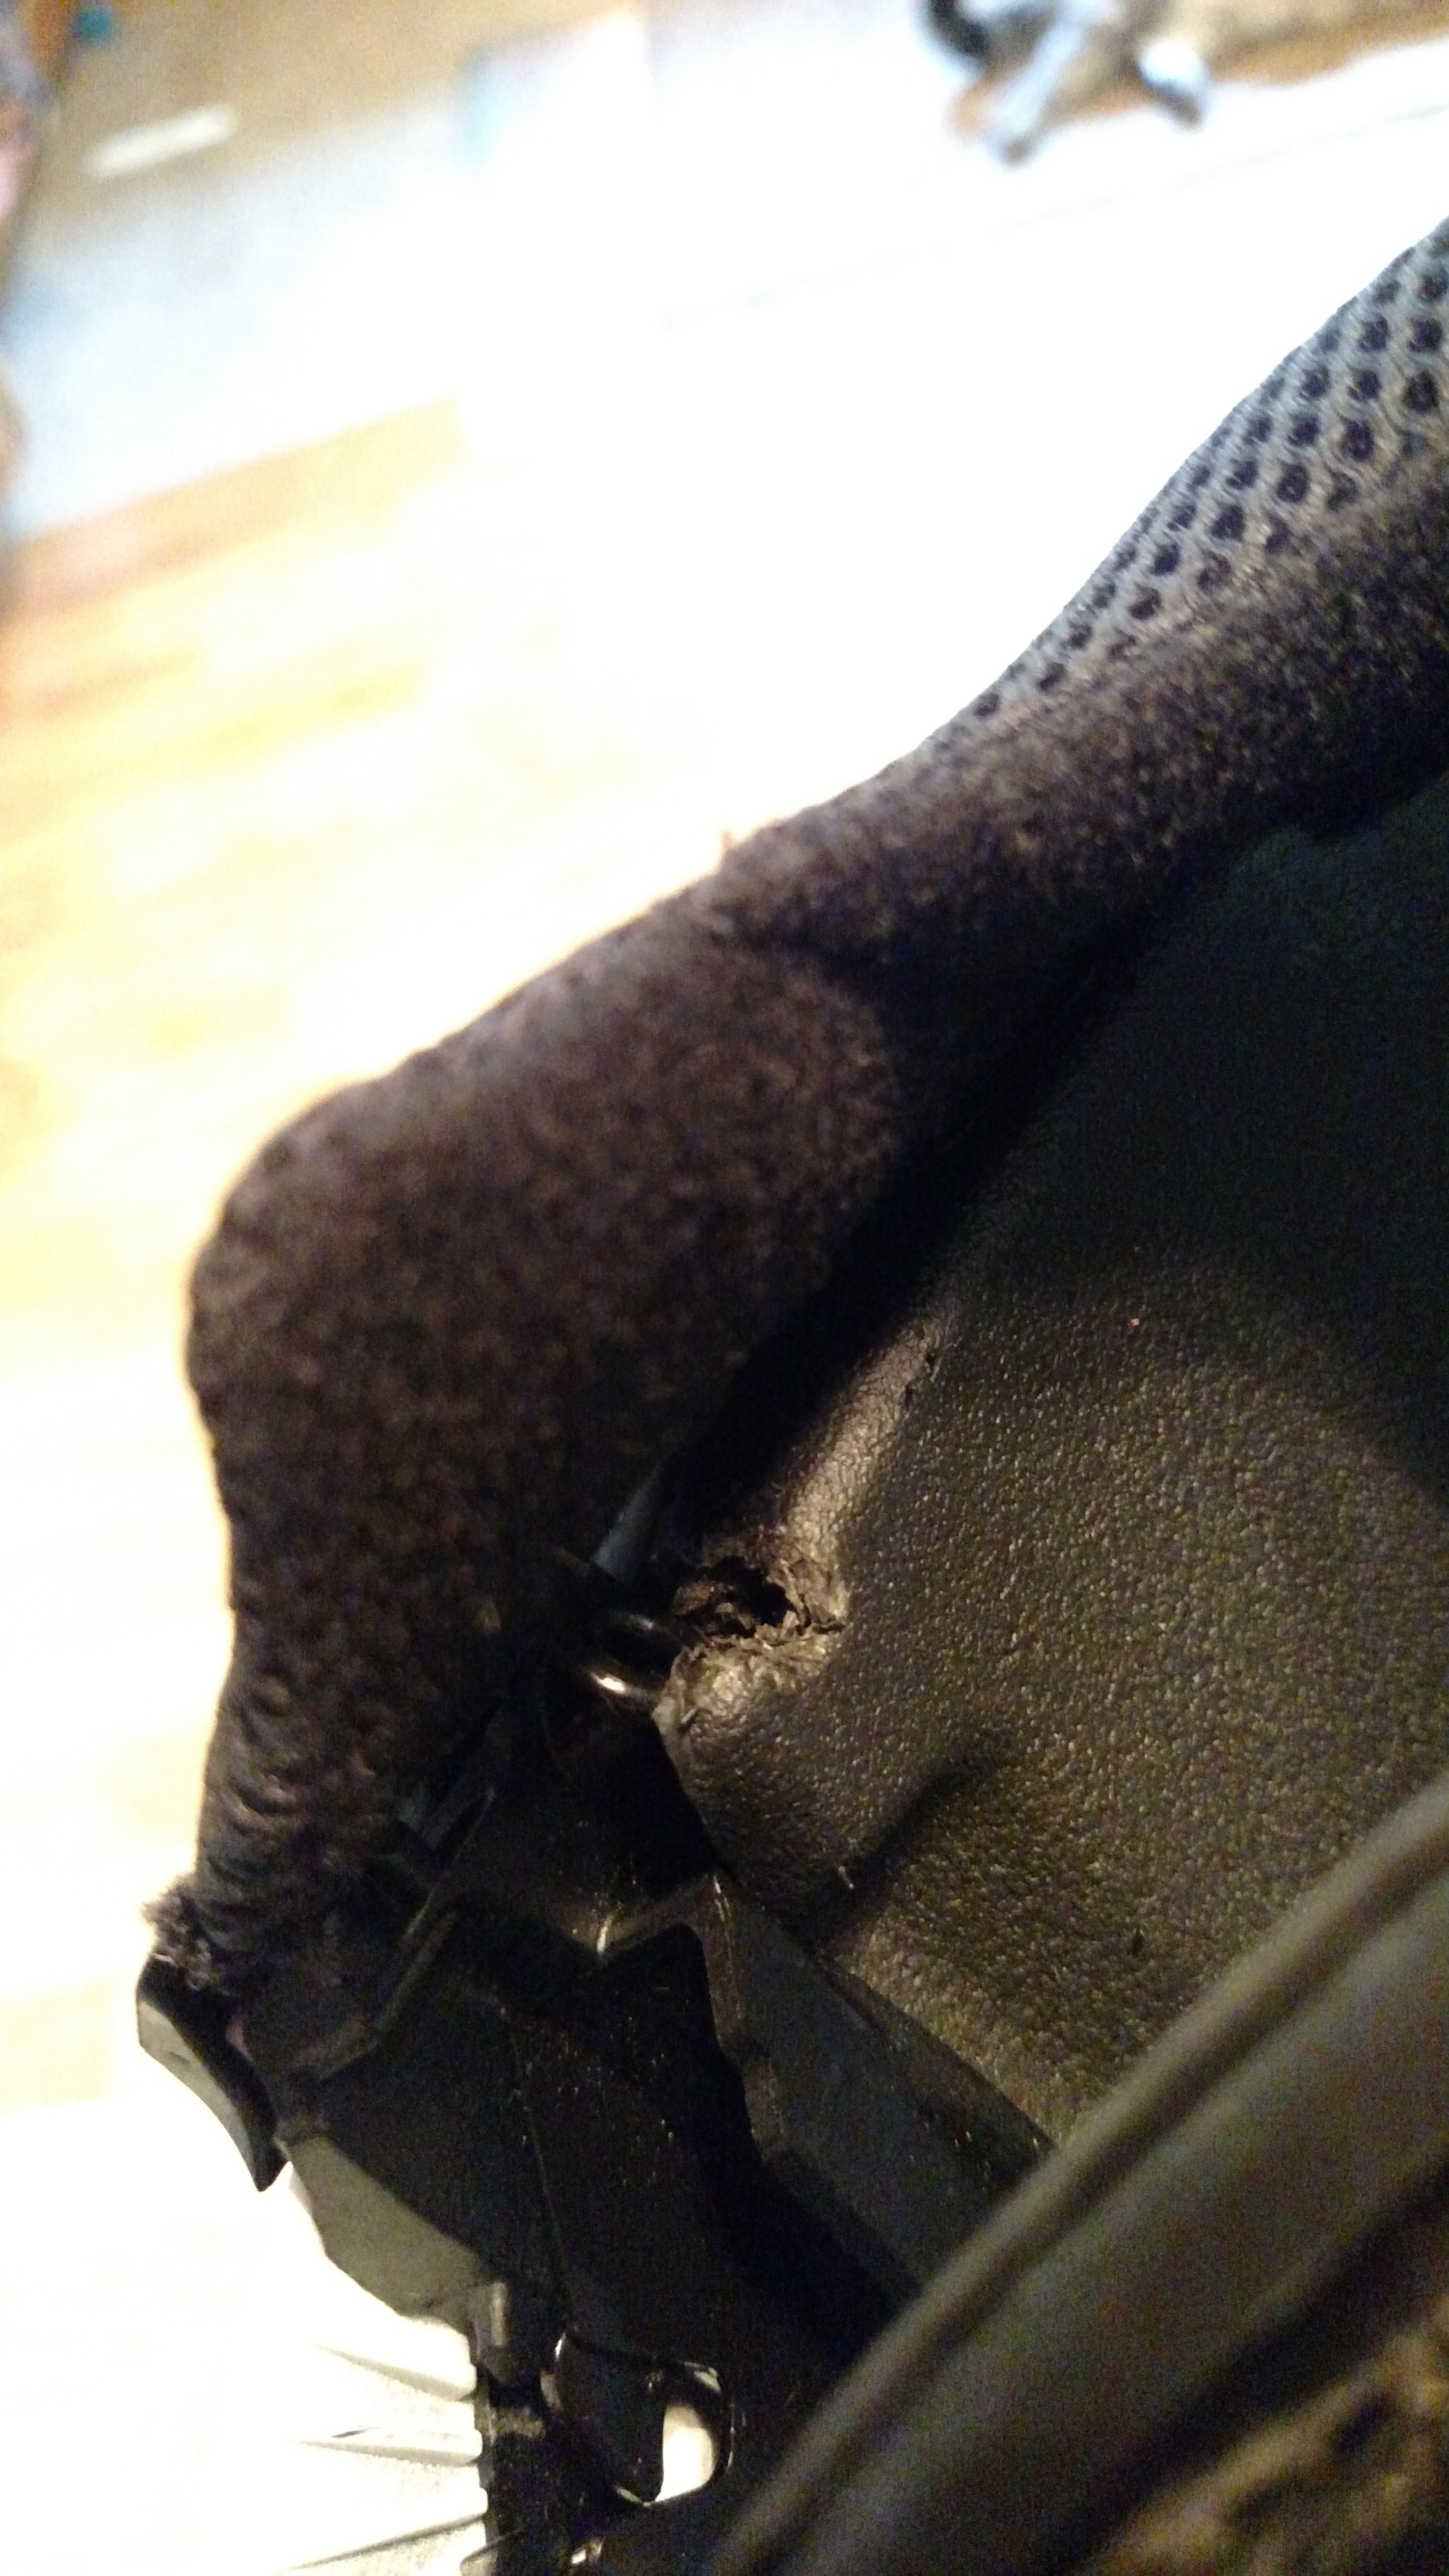


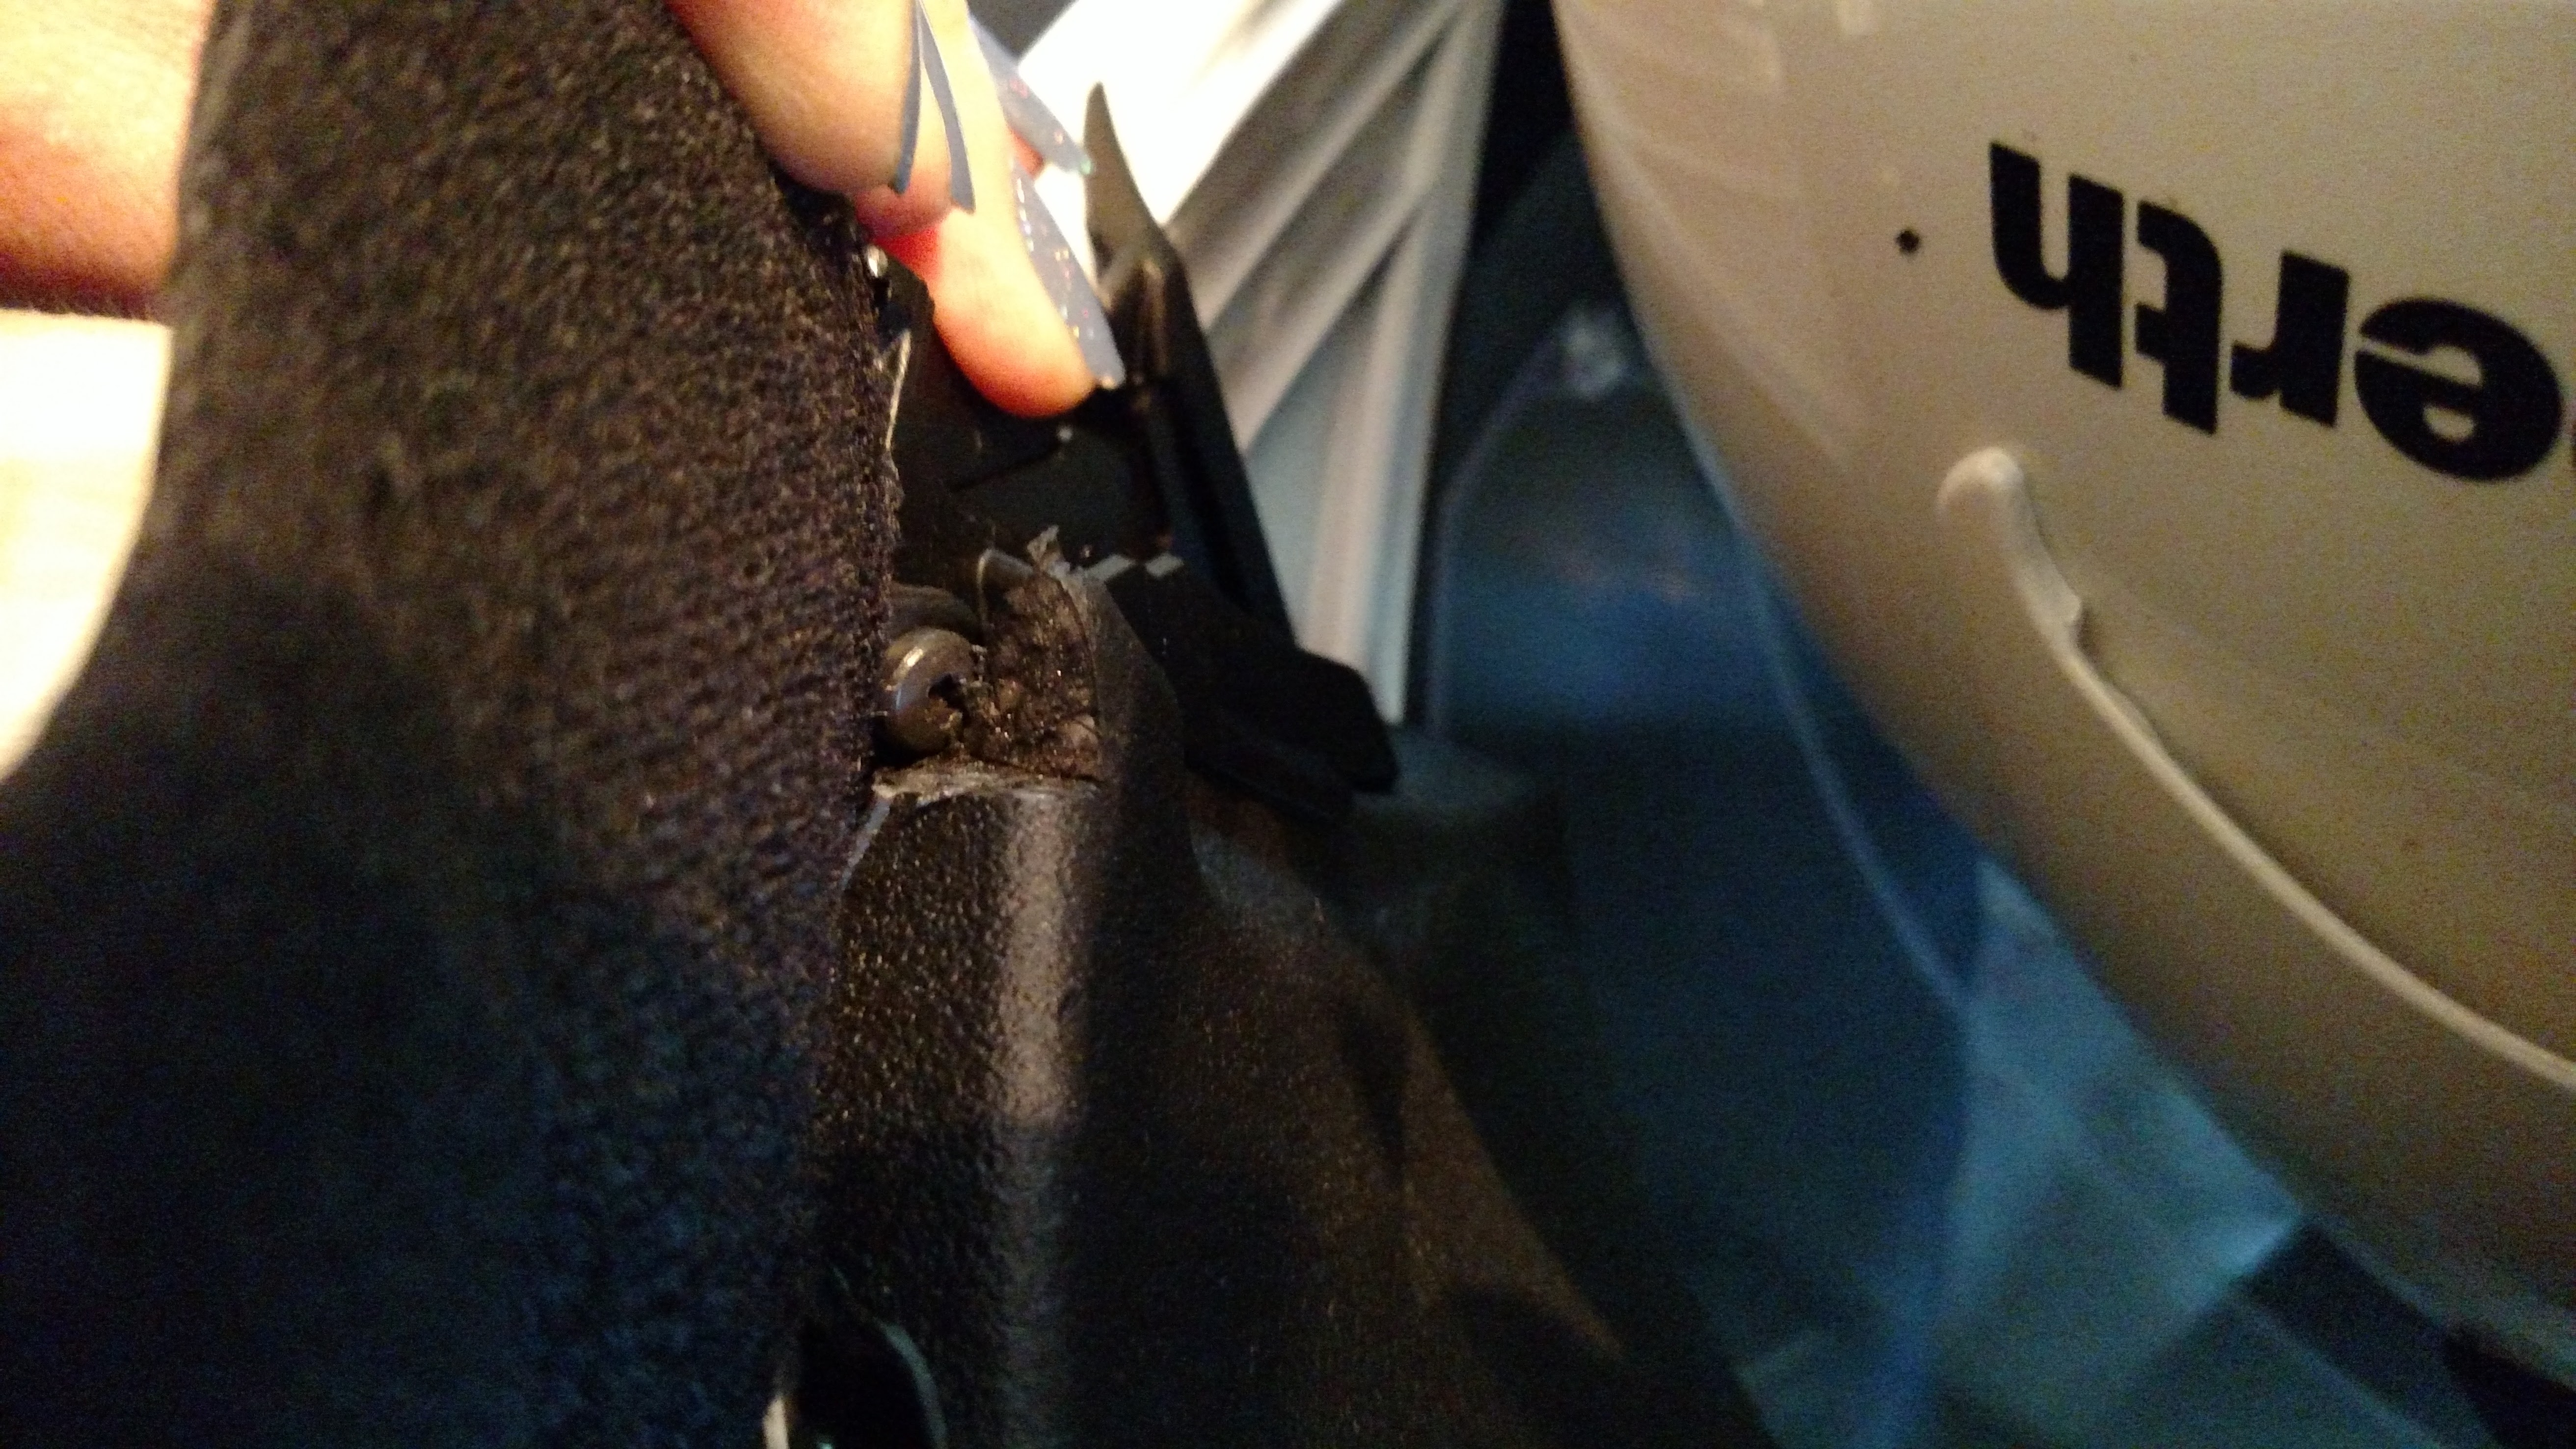
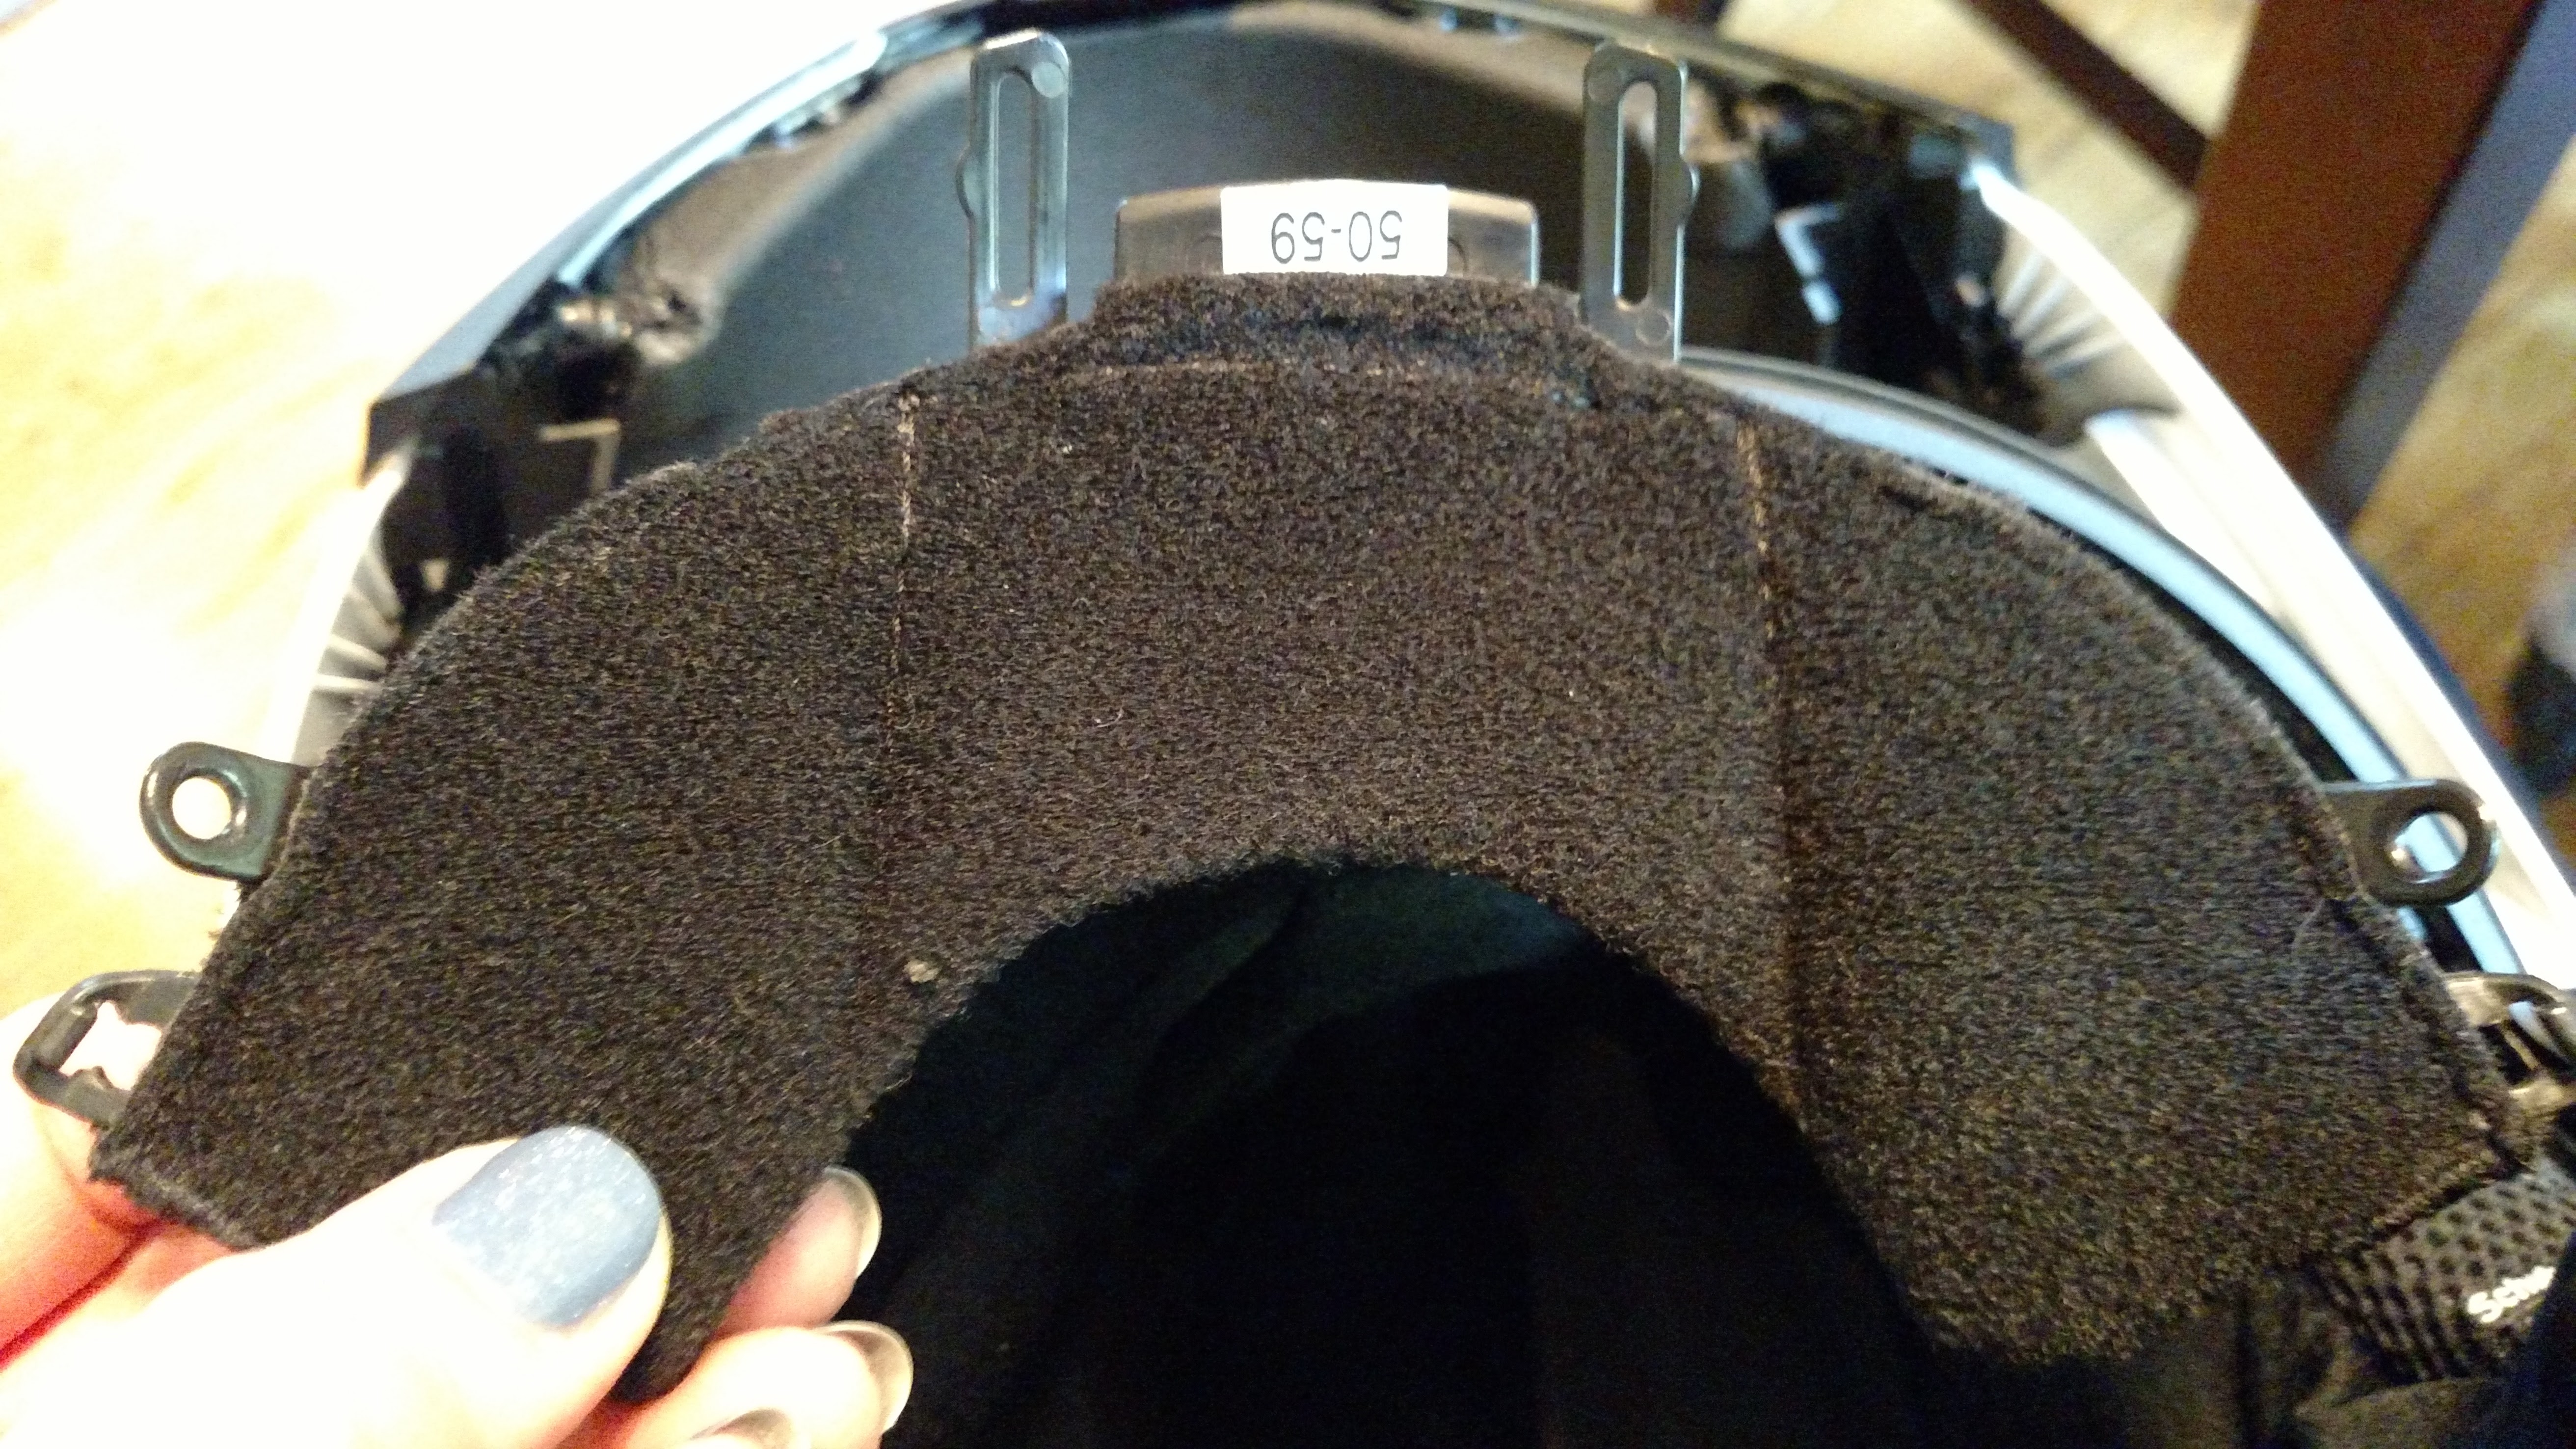

The helmet is only slightly modified (ahem) and the chinskirt can be reinstalled pretty easily. I put the bolts back in.
A ride with the newly-customized helmet shows it moves a LOT more air and doesn’t suffocate me at stops, isn’t noticeably louder, does not argue with my comm system’s boom mic nearly as much as it used to, the chinbar is easier to close, and now I can ride with the clear visor closed all the time without cooking my face or fogging up my glasses. Big win!
]]>I’ve ordered two Kermit Chair bags from him. They replace the bags the Kermit chairs come stuffed into, AND you can fit your leg extensions in there too — it really helps you keep track of all the parts of those stupid expensive chairs.
I recently went looking for tank panniers to fit on the AltRider crash bars on my Super Ténéré, and found a few expensive bags that didn’t quite fit. I contacted Brady, who had already worked out the dimensions of these things, and he made me a set of bags designed just for these crash bars. They’re a fantastic fit and super convenient!
 From Brady: Standard rectangular cordura liners for hard luggage are $35/each + shipping. Standard bags include: 1000 Denier material, carry handles, double pull YKK zippers, top or side opening. Other options are available as well for additional costs.
I have no connection to him other than being a happy customer; I highly recommend his work. Contact him directly at [email protected].
]]>
Having owned and used Sena’s SMH10 for bike-to-bike comms and piping music for several years, I loved it and was eyeing the camera version. About a year ago I received the 10C as a gift. I’d won a GoPro3 in a drawing a month before and, while the GoPro filmed my commute and other things easily enough, the 10C has a couple of huge advantages over the GoPro and other action cams: (a) it talks to you and (2) you can fiddle with your camera while on the move (maybe not the smartest thing, so keep your eyes open and don’t go poking at it in the technical twisties). The audio function lets you know just what it’s doing: “camera on,” “recording,” etc. as well as a shutter release noise for still shots.
The 10C mounts to a helmet as easily as any other Sena communicator – it includes speakers and a microphone (boom or wired, depending on your helmet design) and will take a reasonably patient person about an hour to fit the mount and all of the pieces, and tuck all the wires out of the way. The unit itself is unobtrusive (again, unlike a traditional shoebox-on-your-helmet action cam) and has two planes of adjustment: up/down and side-to-side swivel. A few tests of stills and short videos will make the needed adjustments evident.
Battery life is surprisingly good for a camera and helmet comm system. If you anticipate only occasional camera use the battery life for communication is an easy all-day affair. If you’re camera and video heavy you can kill the battery inside of four hours. If you’re recording video constantly you’ll kill it in two. There is a good (or annoying) feature, however: the 10C will not let you obliterate its battery with its camera. It will turn the camera off when the battery has only a couple of hours of talk time left, and you will not be able to turn the camera back on until you’ve recharged. But you’ll still be able to talk over your comm for at least an hour.
Once I got used to the functions of the 10C, the GoPro ended up in a drawer, and after months of neglecting it, I gave it to an action-camera-less friend. The Sena’s ease of use made the GoPro seem like only a small step up from my old pink 8mp Nikon Coolpix, and heck, I have a RAM camera mount. Where is that old Nikon anyway…
The 10C has a couple of playback/review options: you can use a micro-HDMI cable to plug it into any HDMI-capable TV, or you can pop the microSD card out of it (spring-loaded and tiny! Be careful!) and into anything that’ll read it (I use an LG tablet with a microSD card slot). This means that at the end of the day on a motorcycle tour, I can fire up my tablet and bore everyone with all of the photos and videos I took that day!
The best feature, to my commuter’s mind, is the video tagging: in video tagging mode, the 10C will capture the previous minute, the current minute and the following minute in three one-minute clips. Imagine: set to video tagging mode, the moment you are out of danger, hit that button and save all that preceding mess to video. I don’t need to elaborate; we’ve all been there.
The audio functions can be surprising if you’re like me and start using technology before fully reading and understanding all of the literature. It will record your voice while recording video, so it’s great for all you budding moto vloggers, but it can also record your conversations with other Bluetooth-comm enabled riding buddies, who may or may not want to be recorded. It will also include whatever music you’re piping into your helmet at the time, so keep that in mind if you’re planning to upload to YouTube. Any music that is copyrighted will get your video flagged for takedown. The audio is single-stream and cannot be edited out; choose wisely or go with silence. Also, I found that wind noise will disrupt the soundtrack pretty significantly at highway speeds.
Which brings me to the cons: there aren’t many. This is a spectacular piece of kit. But I wish it had the app depth the 20S does – you can control some features of the 10C with Sena’s smartphone app, but (IMO) the most important one, communicator pairing view & hierarchy control, is missing. Also, while the 10C’s communicator functions can be controlled by the Sena remote, the camera settings and functions are not part of the remote’s protocol. There I go diving into technology again! When I saw the remote was compatible with the 10C I made a bad assumption, hoping to take pictures without having to take my hand off the bar. Alas. It is nice to be able to control the communicator and music functions from the handlebar, though.
I would embed a video here, but there’s no real way to show you just how good the videos are, from this thing. Uploads to the internet suffer compression loss and look like any other crappy youtube video, unless you do your own hosting and can handle the bandwidth (which I don’t).
You can find all of the specs for the 10C at the Sena website (www.sena.com), which states: “It’s capable of full HD video (1080p:30fps and 720p:30/60fps) with 3.5 MP still shot image capture and shot, burst and time-lapse photo modes.” On a large HD TV the video isn’t great. It can tend toward being sort of blocky and streaky. But on a tablet the video is gorgeous. If you’re in the market for a Bluetooth comm system and an action camera, it is hard to go wrong with the 10C.
Buy the Sena 10C from Amazon to Support Us!
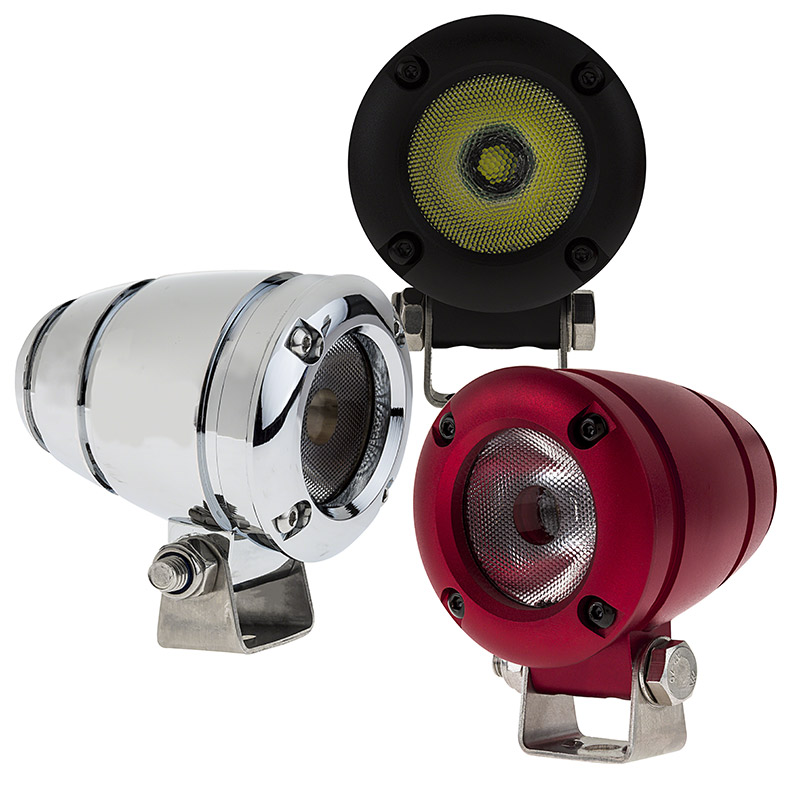
]]>My research let me to an LED work light offered by SuperBrightLEDs.com. Though somewhat known for off-road light bars and wacky seizure inducing accent lighting, I’ve purchased LED replacement bulbs for my Subaru BRZ from them before and am quite satisfied with the results. Numerous blogs and forum posts, specifically for my PC800 and otherwise, spoke highly of these lights for motorcycle driving light use. They’re also weatherproof, which is obviously a requirement. So for $34.95 a piece (I saved $5 by ordering red housings to match my bike rather than black or chrome), I ordered two of these lights with a 25° beam angle. They are also available with a 45° beam, but I wanted a narrower beam to shoot the light as far down the road as possible, and to avoid blinding oncoming drivers.
The lights arrived more quickly than expected or promised. I decided to mount them to the front forks in place of the amber reflectors. This would keep the lights down low, as well as enable them to turn with the front wheel, something the stock headlight doesn’t do. The bolts that came with the lights just happened to be the same size and thread pitch to screw in where the reflectors went, but slightly too long, so I bought shorter ones at the hardware store. Physical installation was simple – just bolt on the bracket, then bolt the light on.
You’re on your own for wiring. The lights come with positive and negative pigtails, and that’s it. For testing purposes, I decided to disconnect my halogen driving light and hook the new LED lights to its existing power wiring and switch. Despite there being two lights rather than one, each LED only draws 10 watts, as opposed to 35 from the halogen bulb, cutting my power consumption almost in half. Most bikes, the PC800 included, don’t have much extra electrical capacity, so LEDs are a great option for motorcycle use. Aiming the lights was a little tricky, since I wasn’t able to get a wrench in to loosen or tighten the bolts holding the brackets to the forks with the lights installed, but with some finagling and a couple of failed attempts I got them set the way I wanted.
The difference was literally night…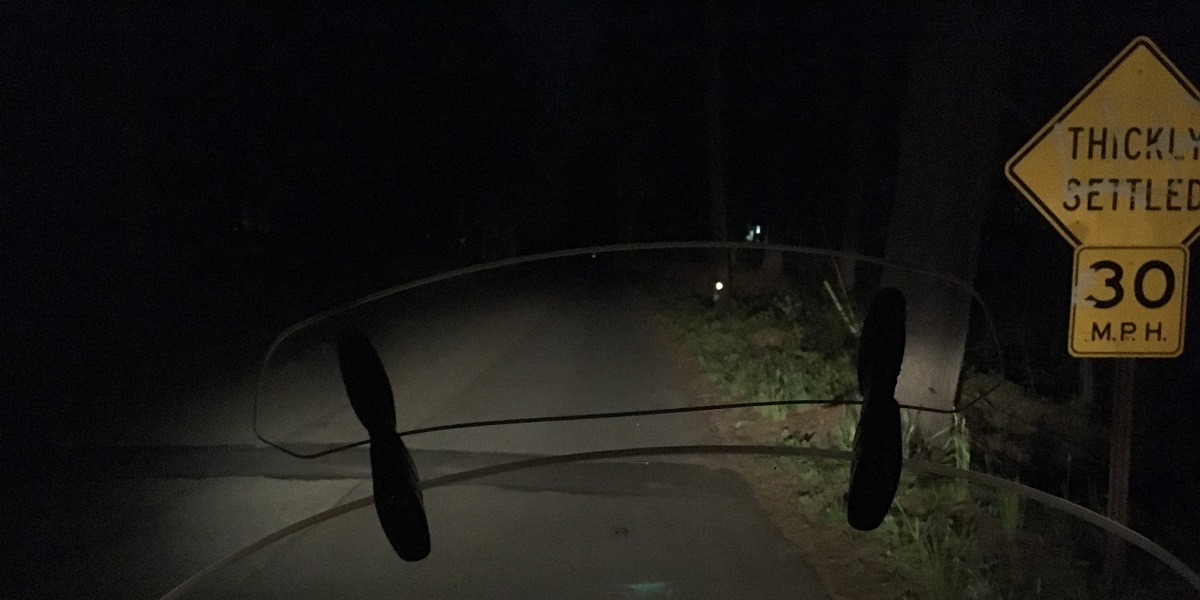
…and day.
My stock headlight is completely overpowered by the twin LEDs on my forks. I can see much farther down the road, and light up reflectors far beyond those that I used to. If I could turn off my headlight I doubt I’d notice much difference in the overall lighting. The LED driving lights are so effective that I decided to remove the old halogen light and wire them into its old wiring permanently.
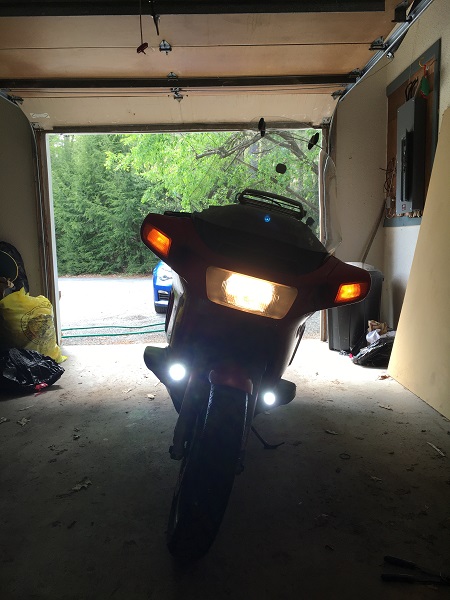
They’re a great help at night, but the driving lights also significantly improve my daytime visibility as well. Moving the lights farther away from my headlight makes them stand out much better than my old halogen driving light, which blended in with the headlight until you got close. Motorcycles are supposed to have an odd number of lights anyway to differentiate them from cars, which have an even number of lights. The running lights are good, but the driving lights really call out to other traffic “I am a motorcycle” rather than “I am a car with a broken headlight.” Anything to help me be seen and avoid getting cut off is a good thing.
It’s worth mentioning that these lights are not DOT approved, and are sold specifically as work lights, not driving lights. If that presents a problem for state inspection, you might want to turn them off or even remove them before you get checked if you’re worried. In my experience, motorcycles generally seem to get away with brighter lights than cars in the interest of safety. Even if they’re not technically street legal, law enforcement tends to turn a blind eye. I rode right through a speedtrap this morning with these lights a-blazing and had no trouble at all. It probably also helps that I took the effort to mount them low and aim them to be visible, but not blinding, to oncoming drivers.
I no longer have any issues hopping on the interstate at night. While you should always be more cautious after dark, I’m no longer afraid of overdriving my lights at or below the speed limit at night. These are just what I needed for a SaddleSore 1000, as well as for general visibility. And for around $70 for a pair ($80 if you splurge for black or chrome), they are well worth the investment. While more expensive motorcycle specific HID driving lights are probably better than these, I can’t think of a more cost effective option for a good pair of driving lights.
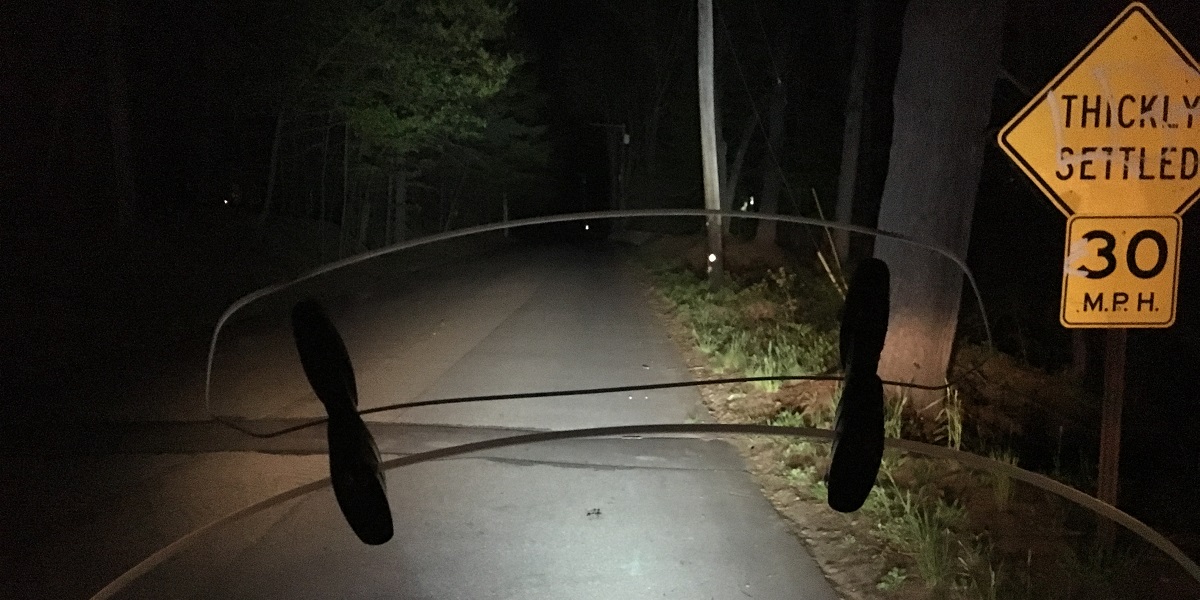
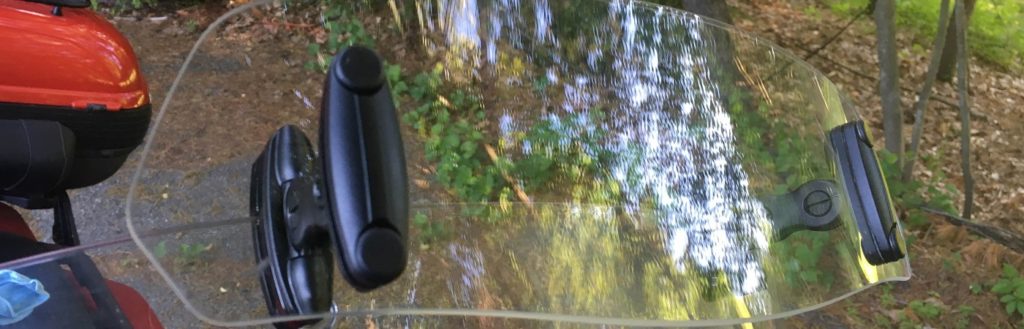
]]>After some research I ended up buying a Puig clip-on windshield extension from Revzilla. It’s super simple, and at first doesn’t look worth its $108.85 sale price for a piece of clear plastic and two small brackets. But as I assembled and installed it, I could see that the money goes into a well thought out design and high quality parts. There’s no drilling involved, and single Allen wrench is all you need. Naturally I lost all of mine in the move to my new house, so I took a quick trip to buy a replacement after tearing the place apart looking for them.
Replacing my wrench set was the most time consuming part of the installation. Two bolts attach each bracket to the visor, and a single bolt loosens and tightens the clamp onto the top of the existing windshield. The clamp is extremely well padded where it clamps down, and shouldn’t hurt the windshield at all.
 I never understood why fancy bikes have power windshields that you can raise and lower – until now. All the way down, it still sits just tall enough to greatly reduce the noise in my helmet. I can leave my helmet visor open for fresh air but still be protected from the direct wind blast, bugs, rocks, alien spacecraft, etc. Raise it all the way up, and it blocks everything – great for cold mornings, fast highways, and especially cold mornings on fast highways. I have to look through the extension rather than over it, which I don’t prefer, but that’s the price of total coverage, and sometimes it’s worth it.
While not operated by motors and switches, it’s easy to adjust up and down, even while in motion. The notches in the hinges’ movement are stiff enough to not vibrate, even on rough roads or at high speeds. It hasn’t been warm enough yet for me to do this, but it’s even possible to angle the extension to deflect air toward me instead of away if I want to cool off. It’s far more effective than the vent built into the ClearView windshield.
Arguably the right way to fix the problem is to replace my windshield with a taller one, sized specifically for me. It would also be far more expensive, more work, and it wouldn’t provide ventilation when I want it like the extension does. It may not look as sleek as a single piece windshield, but I don’t care. It’s effective, and between its added protection from the elements as well as allowing them in when I want to, it’ll actually extend my riding season. It seems like a lot of money for a piece of clear plastic and two brackets, but I think it’s well worth it for the advantages it provides.
]]>