Musical Tires
The 1986 parts bike got fresh tires in anticipation of a successful engine rebuild. When that blew up in my face (literally) and the 2001 bike replaced it, the plan had always been to swap wheels to put the good tires on the good bike. I just hadn’t gotten around to it until five years and one owner later. Whoops.
The parts bike can get pushed around on bald, dry rotted tires indefinitely, as long as they hold air. The tires on the parts bike are still in good shape. The rear had precisely three miles on it. I know because I put those miles on it myself, right before the engine let the magic smoke out. So rather than buy new tires for the ’01, the cheap and easy solution was to simply swap wheels between the two bikes. Despite fifteen years between them, they’re nearly identical.
(Please forgive me for not taking my own pictures for this. My hands were filthy and I didn’t want to ruin my phone or real camera.)
I started with the front, since I’d just removed and replaced the front wheel on my PC800. My first issue was figuring out how to suspend one end of two bikes in the air simultaneously. Motorcycle jacks have never worked for me. All the bikes I’ve tried them on have had things like exhausts and kickstands hanging below the frame that they’re supposed to lift. I have a floor jack for a car, but I’d need to keep the parts bike suspended while using the jack on the runner. After trying a few ideas, like blocks of wood in strategic locations, I ended up using an automotive jackstand to hold up the frame in front of the engine. I wouldn’t want to try that with a heavy Harley, but the Savage is so tiny and light that it worked fine.
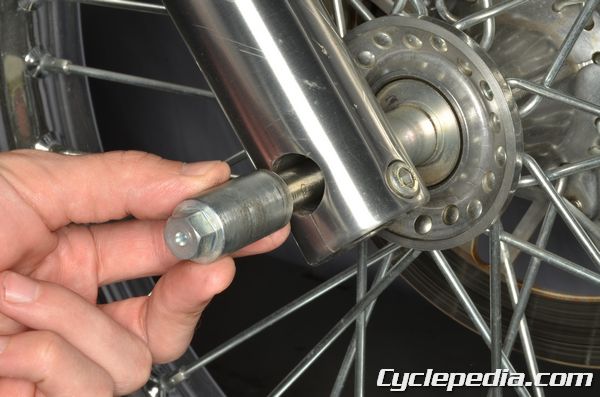
After the PC800, the front wheel was so easy to pull. Just two bolts for the single brake caliper, an Allen bolt at the bottom of the right fork, and unscrew/tap/pull the axle out. There’s no speedometer cable here – it’s driven by the transmission, not the front wheel. Installation is the opposite of removal, really this time.
I also took the opportunity to check the brake pads. I’m glad I did – the ’01’s pads were safe but almost gone. No biggie – they’re so tiny compared to what I’m used to that I figured that new ones wouldn’t cost much. But they ended up being free – from the parts bike, whose pads were in much better condition. Another swap, and another “not good for the road but perfectly good for rolling around the garage” moment for the ’86 parts bike.
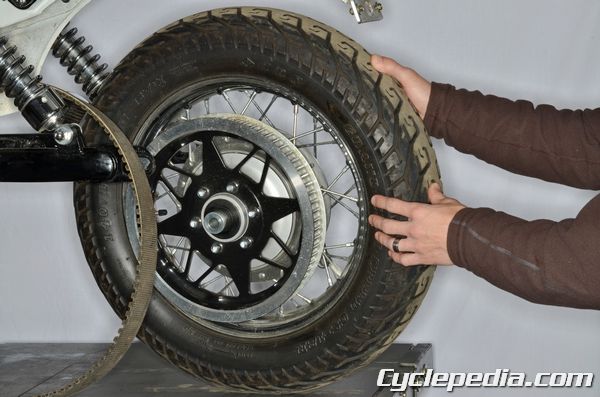
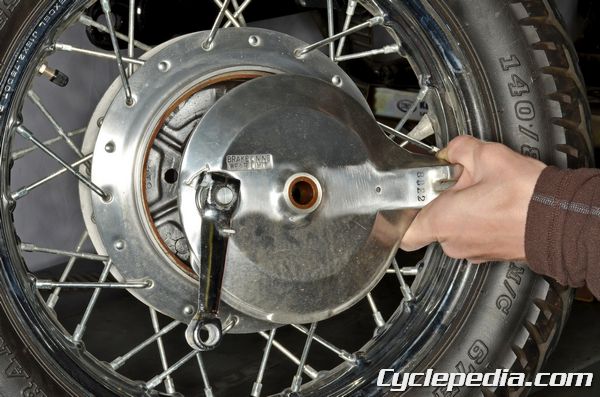
The back wheels were a little more involved. It was easy enough to disconnect the drum brake – a thumbscrew on the ’86, but an actual nut on the ’01. I swapped the thumbscrew to the ’01 so I would no longer need a wrench to adjust it. I also found it interesting that the ’86 used a solid rod to connect the brake pedal to the drum, while the ’01 used a cable, but there was no need to swap that. The axle bolt was fairly easy to remove, and with a little finagling of the belt the wheel dropped right out.
I was surprised to see that the belt drive sprocket popped right off the wheel as well. Six tabs hold it in when the wheel is installed, but there’s nothing permanently attaching it to the wheel. Similarly, the drum brake mechanism came right out of the other side, also not attached by anything except the wheel itself. But hey, it works, and it gave me the opportunity to inspect both sets of brake shoes. They were both in good shape, so I didn’t swap them.
Once again, installation really was the opposite of removal. Unfortunately, gravity was working against me this time, and I had a lot of trouble getting all the various bits and pieces I’d removed lined up well enough for the axle bolt to get through. But after using the jack to lower the bike to a better height, a lot of finagling, and liberal application of the Magic Bike Fixing Words (TM), the bolt reached its final destination. I made sure the wheel was aligned properly thanks to the handy marks on the swingarm, tightened that sucker down, attached and adjusted the rear brake cable, and I was done. Except for the parts bike – I wrenched and swore at that one, too, so I could keep rolling it around. I didn’t bother checking for perfect wheel alignment or brake adjustment on that one.
Throughout the wheel swap, I took a close look at all of the other rubber bits – brake lines, drive belt, etc. – to make sure they weren’t cracked and dry rotted like the old tires were. The ’86 belt had a little dry rot inside, but the belt on the ’01 was in good shape. All of the brake hoses looked good, too.
